In the How to Create a Course article, we mentioned creating custom course modules as an option, aside from using pre-configured modules and templates. Now, in this article, we're going to go through that process in more detail.
Why create a custom course module?
Creating a custom course module can help you focus on key weaknesses discovered using our tournaments and assessments or other security tools your company can access.
You can also more readily customize the content for certain developer groups (like junior or senior developers) as well as define the type of vulnerability or activity types for developers to undertake.
Pre-requisites
Some things need to happen before you can add a new course module. You'll need to have a course created already or be in the process of creating one.
If you haven't created a course before, please see the How to Create a Course article to get started.
So, during course creation (editing), once you've selected the required languages:
- Click the ellipsis button for more options
- Next, click Add content and select the new modules to build the course module.
You'll be presented with three (3) ways to add new modules;
- Add new modules from a template - This will allow you to add modules based on one of our existing, curated course curriculum templates
- Add new vulnerability modules - Target one or more vulnerability categories or sub-categories. Selected items will be imported as modules into your chosen course languages
- Add a new custom module - This gives you total control over all the course options, including vulnerability category, sub-category, type of activity, difficulty level, playing stage, hints, and unlock conditions.
Note: An unlock condition prevents the module from progressing until a prerequisite module is completed first. This helps guide the developers through the required learning activities.)
Adding new course modules from a template
Step 1
- Click the Add new modules from a template option.
- Select the template modules you'd like to add to your selected course languages
Step 2
- Click the Add content to [number of languages] button
Adding new vulnerability modules
Step 1
- Click on the Add new vulnerability modules option.
- From the window, search for the desired vulnerability category and choose an option from the results displayed.
Tip: If a module for your searched vulnerabilities isn't listed, try using the ‘Create a new module from scratch’ option.
Step 2
- Select the vulnerability categories you'd like to add
- Click the Add content to [number of languages] button
Adding a new custom module
Step 1
- Click on the Add a new custom module option
- You'll be prompted to add a name and description for the new module and, if required, add any unlock conditions.
Note: This option will be disabled if no other modules are available. - Scroll down to the Activities section and click the + button to start adding activities
Step 2
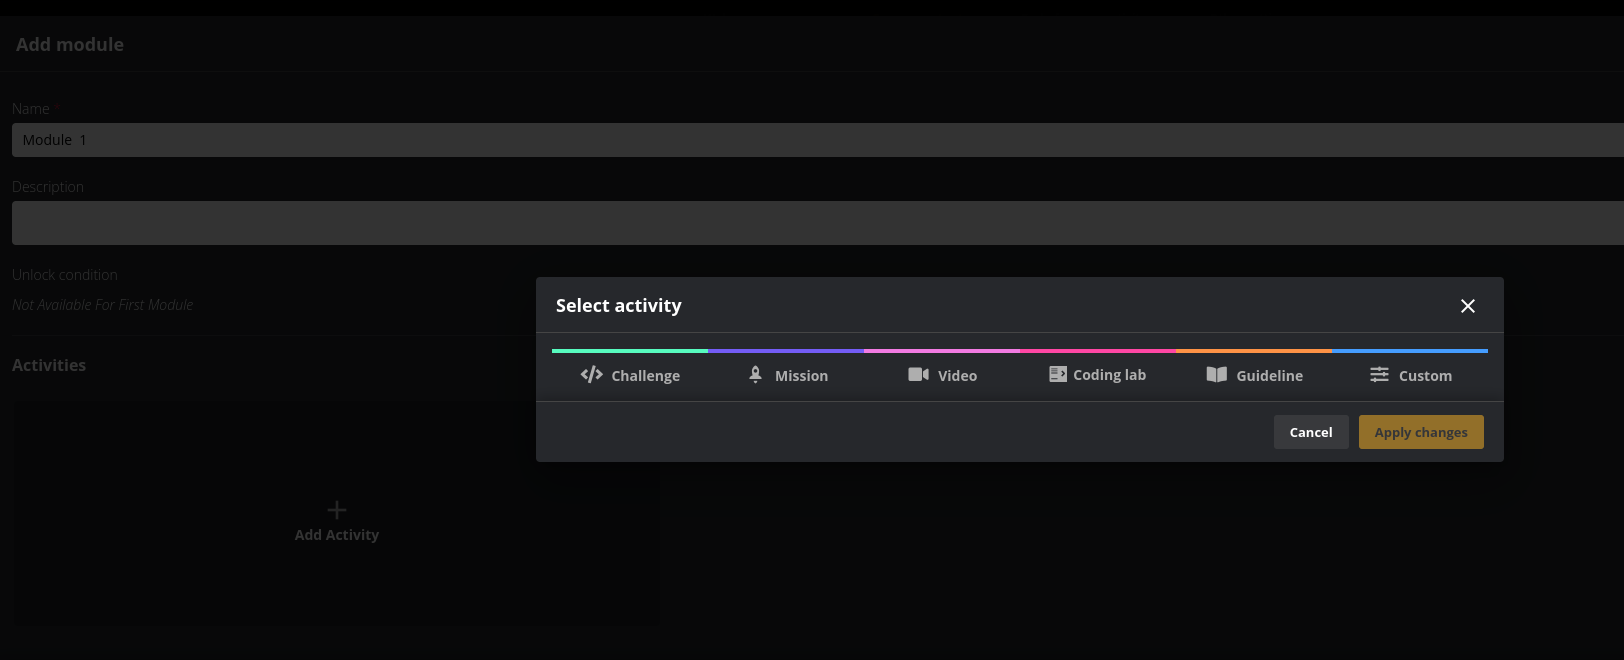
- Clicking the + button to add an activity will bring up a separate window that gives you the option to choose from five different types of activities:
- Video - Demonstrates foundational concepts
- Challenge - Practical code with a choice of interactive playing stages and difficulties. Challenges can be played with hints or no hints. A challenge can also be set up as a checkpoint. Checkpoints are special challenges that are played with no hints and can be used to unlock module content when successfully completed;
- Walkthrough - Walkthrough activity guides the developer step-by-step on how vulnerabilities manifest in a real-world application, providing context and helping developers experience the impact of vulnerable code.
- Mission - Mission activity is for developers with security ambitions to practice their offensive skills in an immersive simulation where they can experience the impact of poor coding practices.
- Coding Lab - Coding Labs helps developers advance their secure coding skills through hands-on training with intuitive feedback in a fully powered in-browser IDE
- Guideline - Guidelines help developers learn both general mitigation strategies to strengthen their security knowledge, as well as in-depth best practices for the selected language/framework.
- Custom - An option to add tailor-made messages and or instructions to any Course module
Adding a Video
Select the Video option and then choose a Topic for the video. There are two topics to choose from:
- Security Design
- Security Foundations
- Security Vulnerabilities
Security Foundations videos can be selected in relation to Application Security Concepts or Web App Security 101. Select a category and then choose the appropriate video you want to add.
You can also choose a specific security vulnerability to target. Select Security Vulnerabilities as the topic and then select the appropriate category and sub-category.
Click Apply changes to continue.
Adding a Challenge
Select the Challenge option. You'll be prompted to choose a vulnerability category, subcategory, and desired difficulty level.
Tip: Difficulty is a great way to cater to the different levels of experience across your team.
Stage(s) allows you to choose how the challenge will be played;
- Identify -- Builds awareness in recognizing vulnerabilities and how they work
- Locate -- Levels up skills in finding vulnerabilities during code-review
- Fix -- Understand how to mitigate and solve the vulnerability
- Identify & Fix -- Combines identify and fix
- Locate & Fix -- Combines locate and fix
Lastly, decide whether or not to enable hints.
To Add a Checkpoint, toggle the checkpoint button. Please note that hints are disabled for Checkpoints.
Once you're ready, click Apply changes to continue.
Adding a Walkthrough
Select the Mission option, you will be prompted to select the mission type; choose Walkthrough, then choose a vulnerability category or subcategory.
To see all the vulnerabilities covered by Walkthroughs, check out this article.
Note: In the Walkthrough, hints are always enabled, and the difficulty level is always set to 'Single difficulty'.
Click Apply changes to continue.
Adding a Mission
Select the Mission option. You will be prompted to select the mission type; choose Mission then choose a vulnerability category, subcategory, and the desired difficulty level.
There are 3 different difficulty levels available for Missions:
- Easy: There is one vulnerability in the code that is also highlighted in the code snippet.
- Medium: There is one vulnerability in the code, but it isn't highlighted in the code snippet.
- Hard: There are several vulnerabilities in the code, but none of them are highlighted in the code snippet.
Click Apply changes to continue.
Adding a Coding Lab
Select the Coding Lab option. You will be prompted to select the vulnerability category and subcategory
Note: In coding Labs, hints are always enabled, and the difficulty level is always set to "Walkthrough"
Click Apply changes to continue.
Adding a Guideline
Select the Guideline option. You'll be prompted to choose a vulnerability category and subcategory.
Click Apply changes to continue
Adding a Custom Message
Select the Custom option. You will be prompted to enter a title and body for your custom message.
A custom activity can be added at the start, middle, or as the last activity in the course as part of any module. It can also be added to existing modules and course content.
For example, a course can be created based on a template (e.g. OWASP Top 10) and then modified to add custom activities.
Tip: Messages can contain hyperlinks to supporting documents and videos. This allows company admins or team managers to include links to their own client-hosted proprietary documents and procedures.
Note: Tick the "requires users to confirm they have completed this activity" checkbox for any activity that's mandatory for developers to complete.
Step 3
Once you're done adding activities, you can review the module you've created. If you're satisfied with all your options, click the Add module button to finish up.
Related Links:
Comments
0 comments
Please sign in to leave a comment.